Table of Contents
Introduction – Show a Pop-up Calendar in MS Excel
In our fast-paced world, being productive and organized is crucial, especially when it comes to managing data. Microsoft Excel is a powerful tool for analyzing and organizing data, offering numerous features to enhance efficiency. But if you’ve ever wished for a handy pop-up calendar like the one in Google Sheets, your wish has come true! Thanks to a helpful add-in, you can now have the same convenient functionality in Excel.
This blog post will walk you through the simple process of adding a pop-up calendar in MS Excel. We will also write a procedure in VBA to show Pop-up calendar at the desired location in Excel sheet.
Watch the Step-by-Step tutorial on YouTube for Pop-Up Calendar in MS Excel
Follow the below steps to add a Pop-Up Calendar in MS Excel:
Step 1: Installing the Add-In
To begin, we need to install the add-in that enables the pop-up calendar feature in MS Excel. Microsoft provides various add-ins through their official Office Add-ins Store, which we can access directly within Excel.
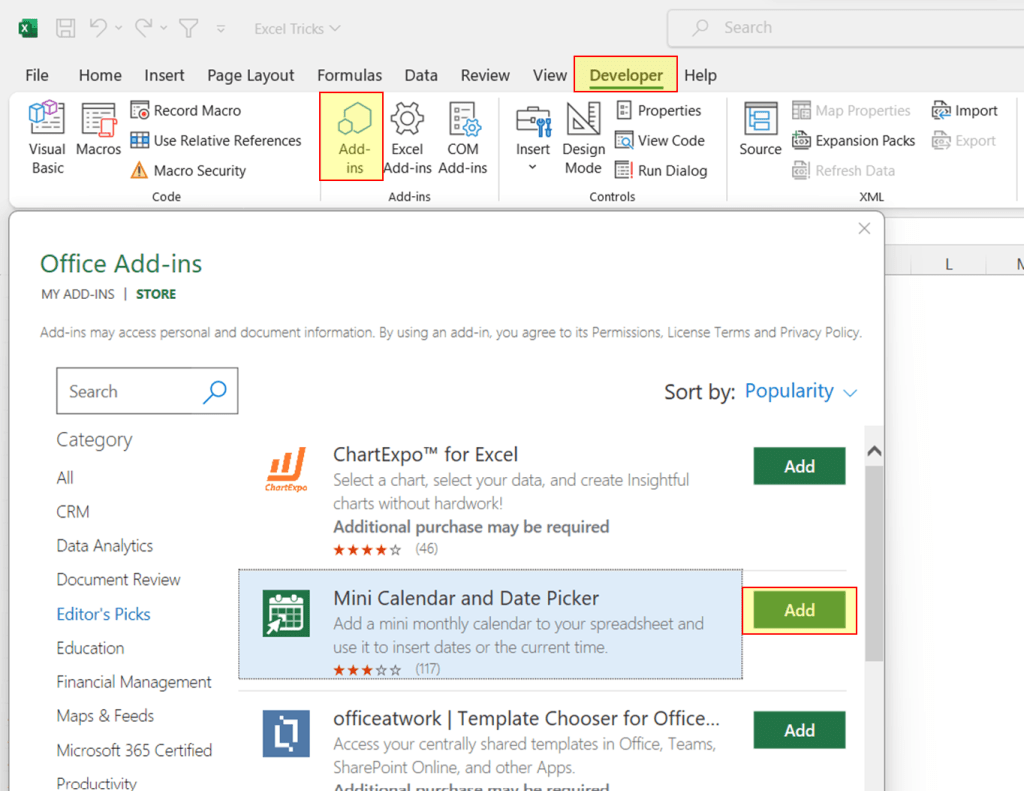
Click on Developer Tab and then click on Add-ins in Add-ins group. It will open the ‘Office Add-ins’ dialog box. Look for the add-in called ‘Mini Calendar and Date Picker‘ and click on add button next to the add-in as shown in below snapshot.
Step 2: Activating the Add-In
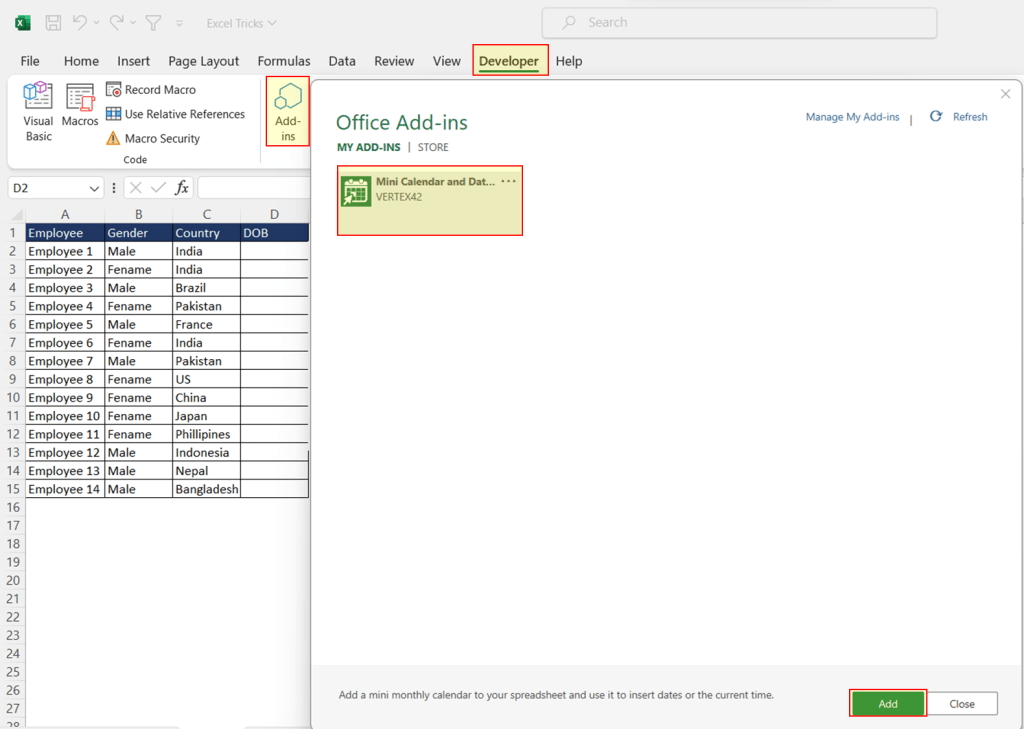
Once the add-in is installed, it’s time to activate it. Simply go to the ‘Developer’ tab in the Excel ribbon and click on ‘Add-ins’. It will show ‘Office Add-ins’ dialog box. In ‘Office Add-ins’ dialog box, click on ‘My ADD-INS’ Tab and then select ‘Mini Calendar and Date Picker’ and then click on ‘Add’ button available at the bottom of the dialog box.
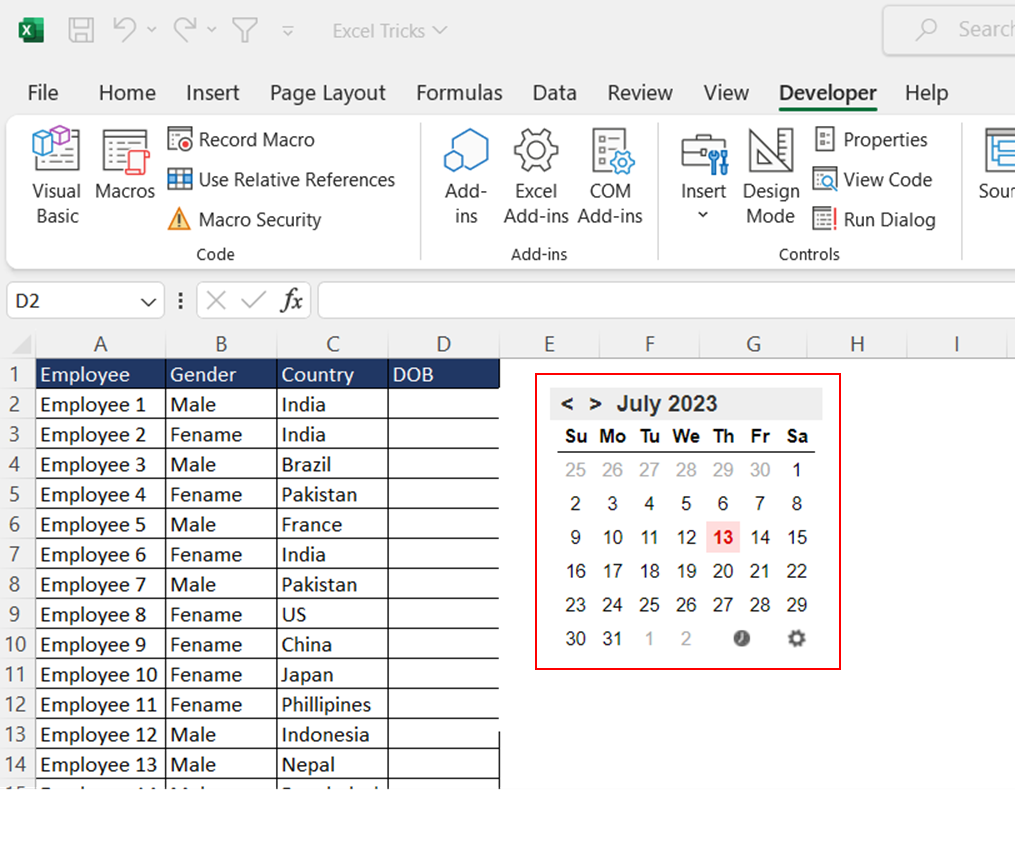
Once you click on ‘Add’ button then a beautiful and mini calendar will start showing in Excel Sheet.
Step 3: Using the Pop-Up Calendar in MS Excel
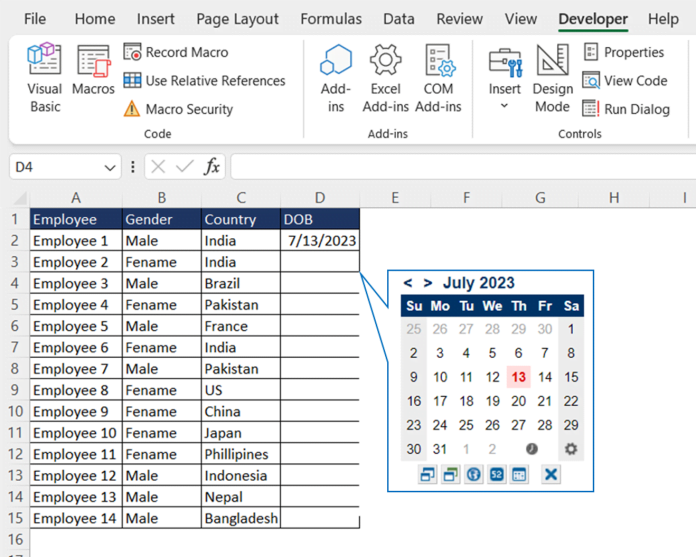
Now that the add-in is active, let’s see how to use the pop-up calendar. Select the any of the cell where you want to enter the date and then click on desired date in pop-up calendar. It will insert the date in cell.

Step 4: Renaming the Calendar and Showing the Pop-up Calendar in MS Excel beside the selected cell.
If you notice, calendar is always showing at the same place and it’s not moving on the selection of cell. We need to rename and add VBA code to make it dynamically appear beside the selected cell and hide if selection is out of date range.
Select the Calendar and rename it using Name box showing above the Column A in Excel. Give the name ‘Calendar’ as shown in below snapshot.
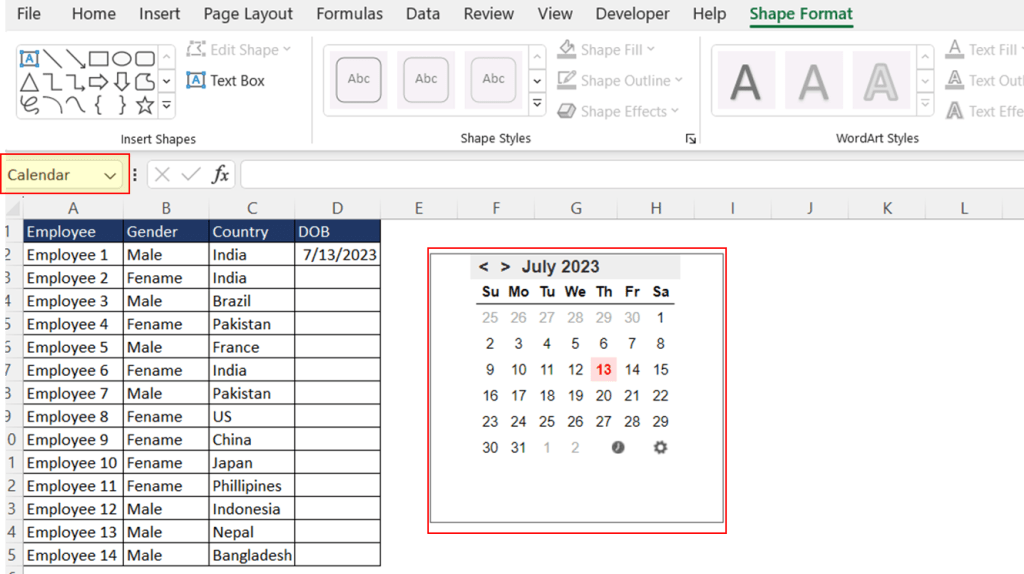
Now, we need to write VBA code on Worksheet Selection Change event. In our example, DOB column is in Column D and value start from the row 2. Hence, Target Column would be 4 and Target Row would be 2 in the code we are going to write.
Move to the code window of the sheet where you are working and paste the below code.
Code to show the calendar if selection is done in specific cells range in worksheet despite having any formatting on cells.
Private Sub Worksheet_SelectionChange(ByVal Target As Range)
    ' Define the target column and minimum row number
    Const TargetColumn As Long = 4
    Const MinimumRow As Long = 2
    Const ShapeName As String = "Calendar"
    Dim calendarShape As Shape

    On Error Resume Next

    Set calendarShape = Me.Shapes(ShapeName)

    ' Check if the selected cell is in the target column and row
    If Target.Column = TargetColumn And Target.Row >= MinimumRow Then
        ' Get a reference to the "Calendar" shape

        ' Check if the shape exists
        If Not calendarShape Is Nothing Then
            ' Show the shape
            calendarShape.Visible = True

            ' Position the shape to touch the right and top cell border
            With calendarShape
                .Top = Target.Top
                .Left = Target.Offset(0, 1).Left

            End With
        End If
    Else
        ' Hide the shape if the selection is outside the target column and row

        If Not calendarShape Is Nothing Then
            calendarShape.Visible = False
        End If
    End If
End Sub
Code to show the pop-up calendar in MS Excel if selected cell has Date format only with no restriction on cell range.
Private Sub Worksheet_SelectionChange(ByVal Target As Range)

    Dim calendarShape As Shape

    On Error Resume Next

    Set calendarShape = Me.Shapes("Calendar")

    ' Check if the selected cell is in the target column and row
    If InStr(1, Target.NumberFormat, "d", vbTextCompare) > 0 _
            Or InStr(1, Target.NumberFormat, "m", vbTextCompare) > 0 Or _
            InStr(1, Target.NumberFormat, "y", vbTextCompare) > 0 Then

        ' Check if the shape exists
        If Not calendarShape Is Nothing Then

    ' Show the shape
            calendarShape.Visible = True

            ' Position the shape to touch the right and top cell border
            With calendarShape
                .Top = Target.Top
                .Left = Target.Offset(0, 1).Left

            End With

        End If

    Else
        ' Hide the shape if the selection is outside the target column and row

        If Not calendarShape Is Nothing Then
            calendarShape.Visible = False
        End If
    End If

End Sub
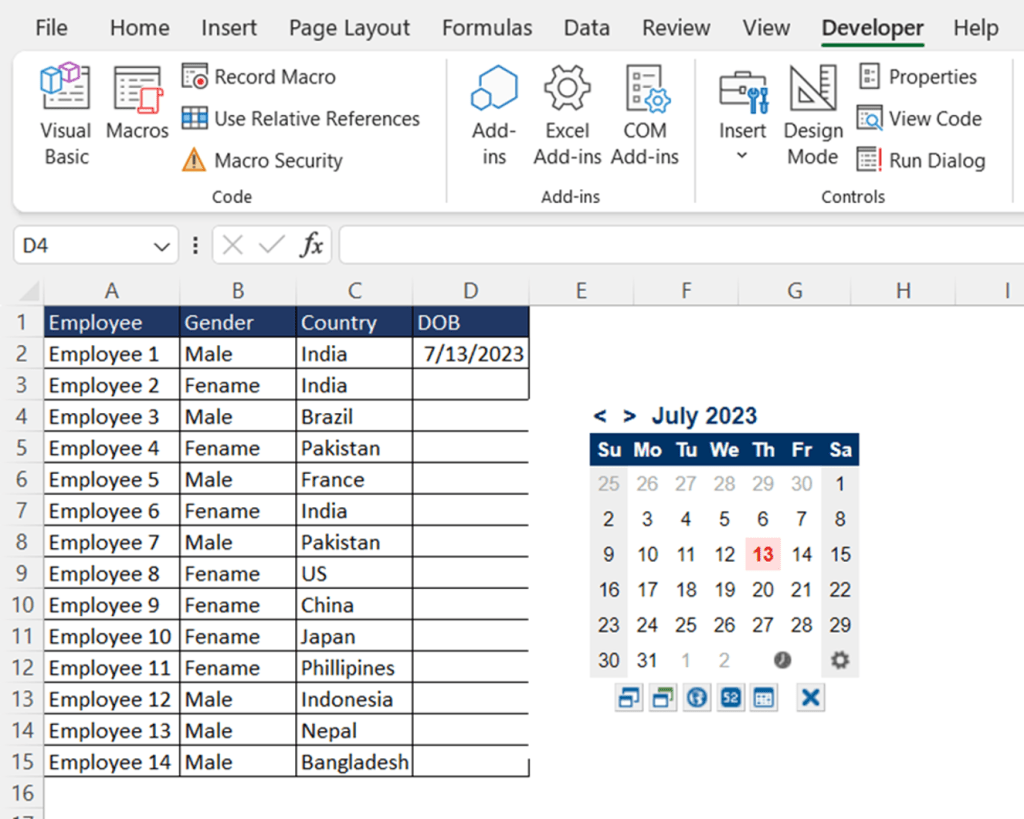
Using the above code, we are showing the pop-up calendar in MS Excel beside the selected cell and hide if the selection is out of date range i.e., Column is not D and row number is less than 2.
In Worksheet, if you click on any of the cell below the column header in Column D then VBA will show the pop-up calendar beside the selected cell top right corner.
Download the demo file used in this tutorial.
Click on the below button to download the Excel file used in the tutorial (Pop-up calendar in MS Excel)


