How to Create a Data Entry Form in Excel Without VBA/Macro
Data entry is one of the important basic task needed when no machine-readable version of the information is readily available for further data processing. Data entry can be done in different ways e.g. filling data in spreadsheet, entering data directly to database and user form. Among all these options, data entry form is one of the best ways to enter data in a table without making any mistake and it also helps users to do their job in most efficient way.
But, creating a form to enter data is not everyone cup of tea. One should have good understanding of Excel and have depth knowledge of VBA/Macro. If you are not comfortable with the coding part, then it would be difficult for you to develop a form. Even recording macro will not help here as it needs different logic and conditional statements.
While struggling with this problem, I have found an inbuilt Excel tool which will help you in creating a dynamic and fully featured data entry form in Excel with a single click. Yes, on a single click.
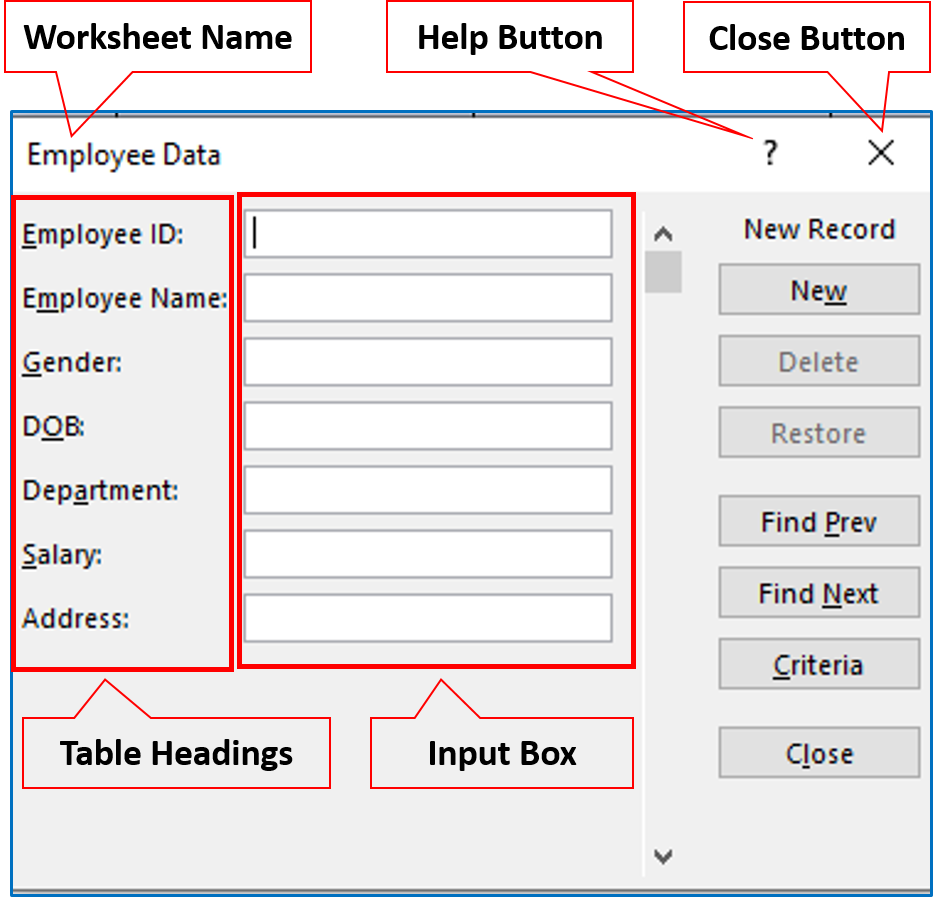
The best part about this form is its pre-designed, and dynamic in nature. Just look at the below example.
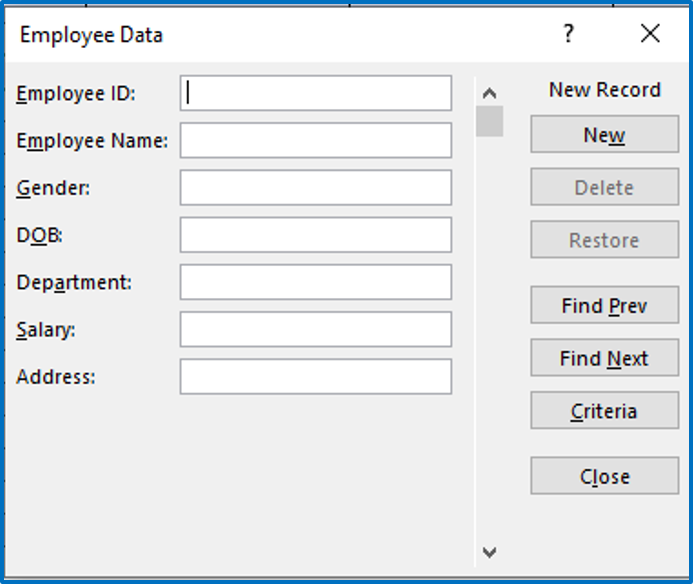
Here’s the idea:
To create this data entry form, the only thing you need to do is to activate it in your Excel application.
How to Create this Data Entry Form
In a short while, you will discover that how easy is this tool to create and very helpful to make data entry.
Excel has provided such an amazing feature in it’s repository but make it hidden for users. As this tool is not available in the ribbon, you need to make it appear before using it.
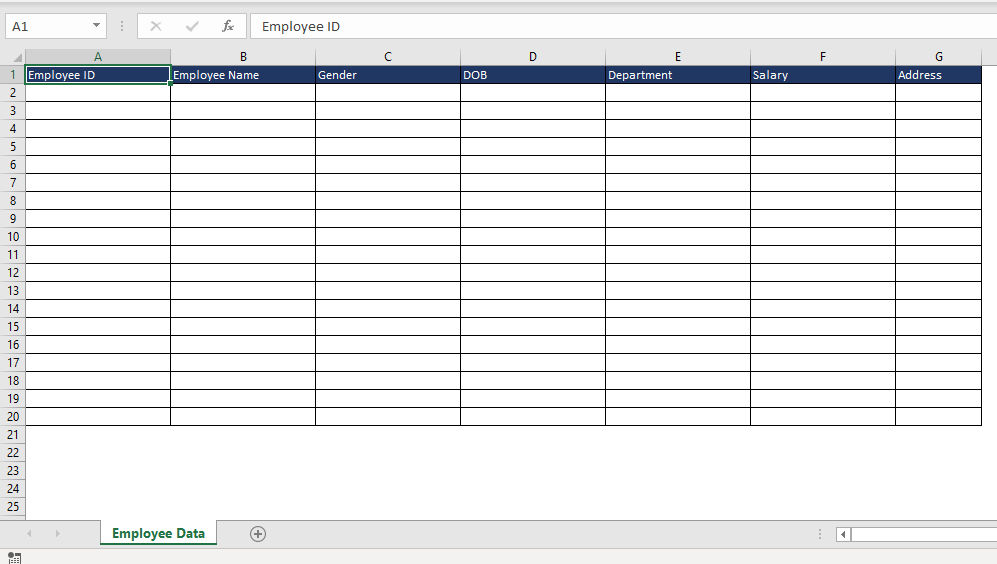
And before you activate this form, you need to create Excel file and a table to enter data or at least headers of the data.
Please follow the below steps to create the file and activate the form feature.
- Create a new Excel file and save the file with relevant name.


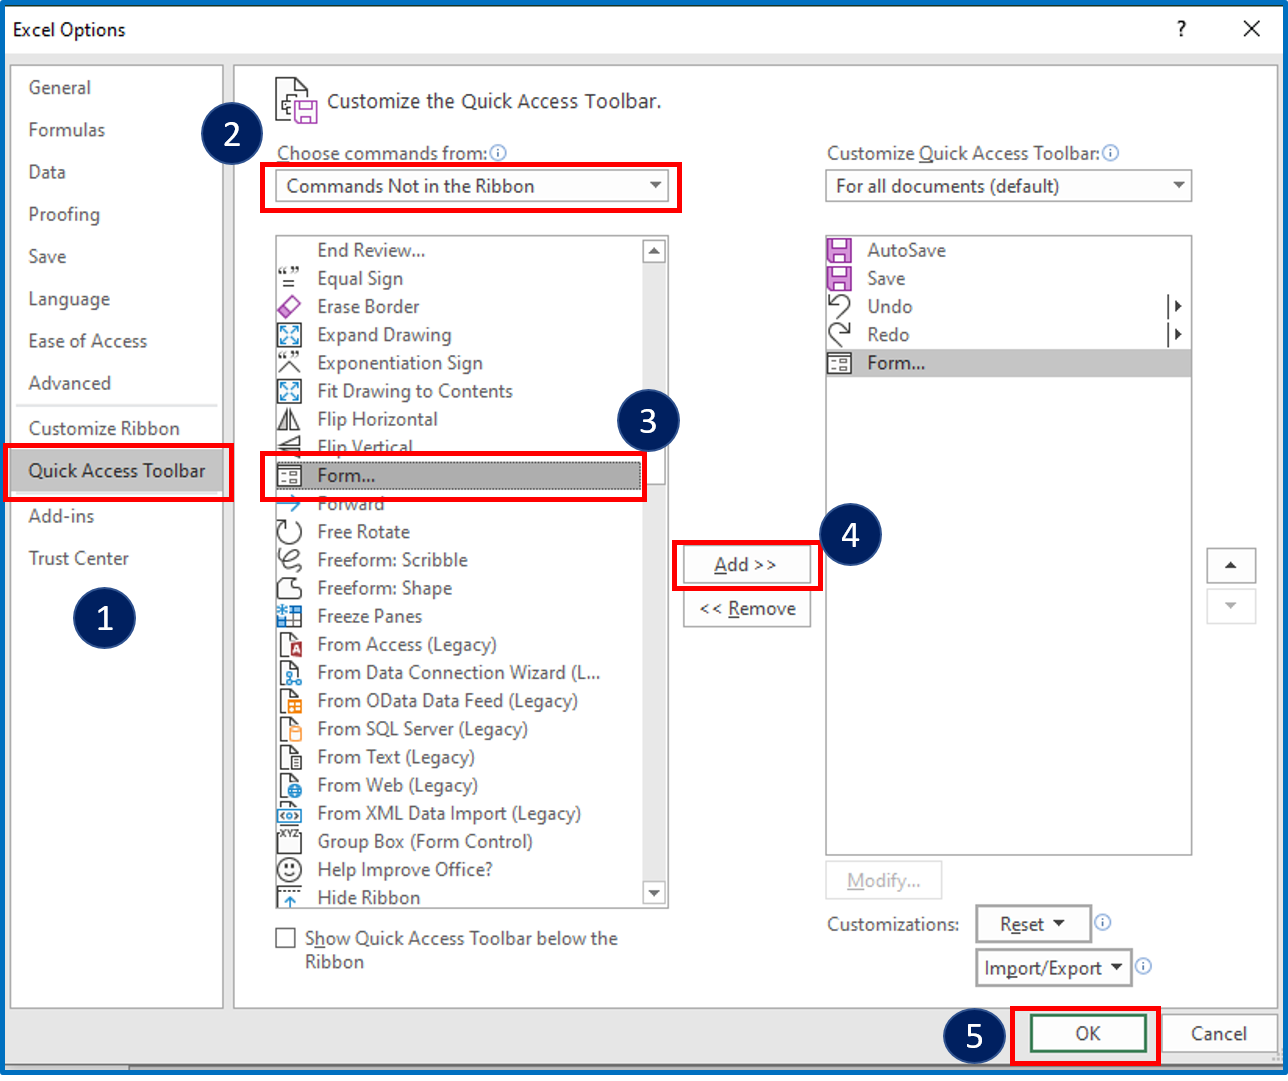
- Click on ‘Quick Access Toolbar’ in left pane
- Select ‘Commands Not in the Ribbon’ from the drop-down ‘Choose commands from’
- Find the ‘Form…’ and select it
- Click on ‘Add’ button to move the ‘Form’ to the right side list box
- Now, click on OK button to exit from Excel Options dialog box

How to Use this Data Entry Form
To use this form you need to learn some basic things which I have mentioned in the below sections.
Create New Entry
To create a new data entry fill all the input boxes with data click on the “New” button. You can also press Enter or click on Close button (if you want to make only one entry and close the form).

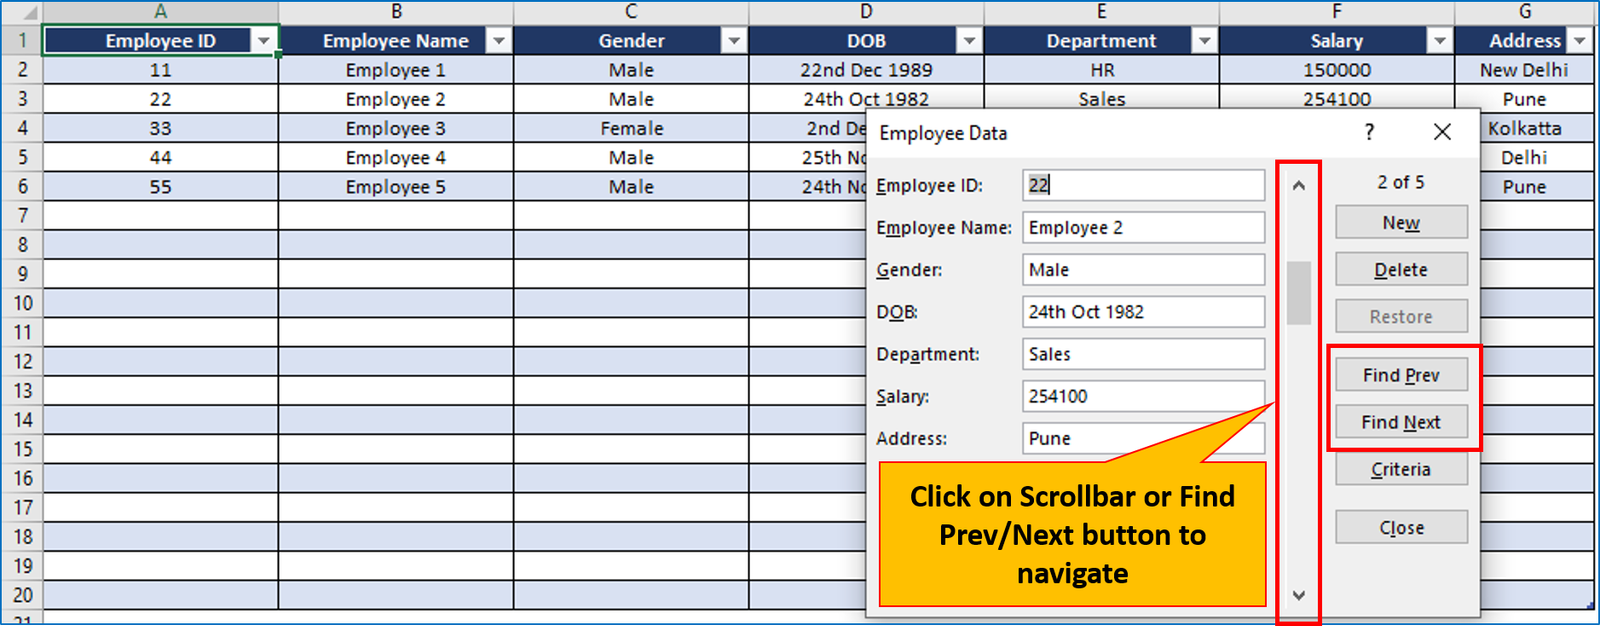
Navigate Entries
To navigate all the entries which you have entered in your table, you can use either the scroll bar or “Find Prev” & “Find Next” buttons to move from one record to other.
Edit Entries
To edit any record available in table, you have to first navigate to that entry by the using ‘Scrollbar’ or ‘Find Prev’/’Find Next’ button (as mentioned in previous step).
Once you select the entry which you want to edit, you can make the changes in any of the input boxes and after that, just press enter key.
While editing your entry (before pressing enter or clicking close button), if you want to restore your entry you can do it with restore button. It will restore the previous data in all the input boxes.

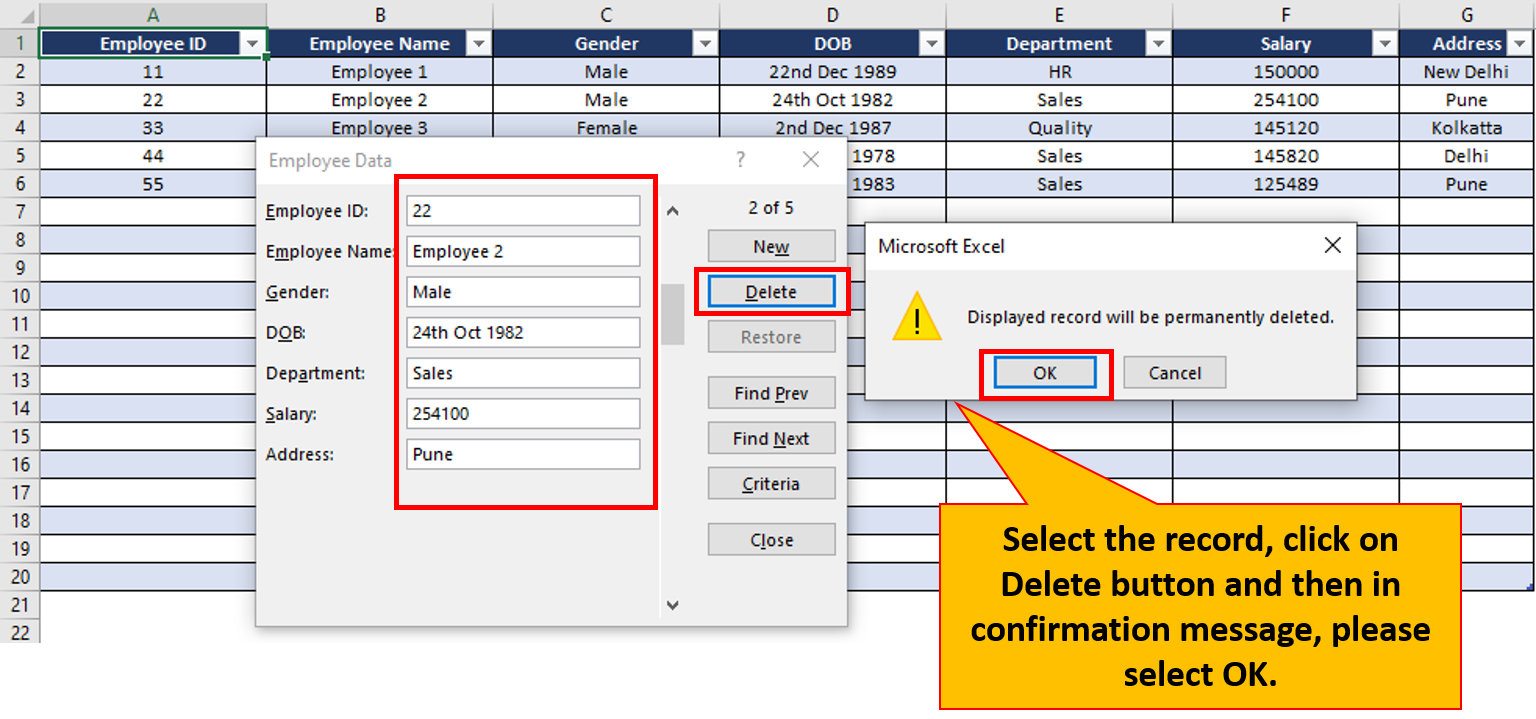
Delete EntriesTo delete a record available in the table, you have to navigate to that entry and click on the delete button.
A pop window will appear for the confirmation of the deletion and it will instantly delete that entry from your data table once you will click on OK button.
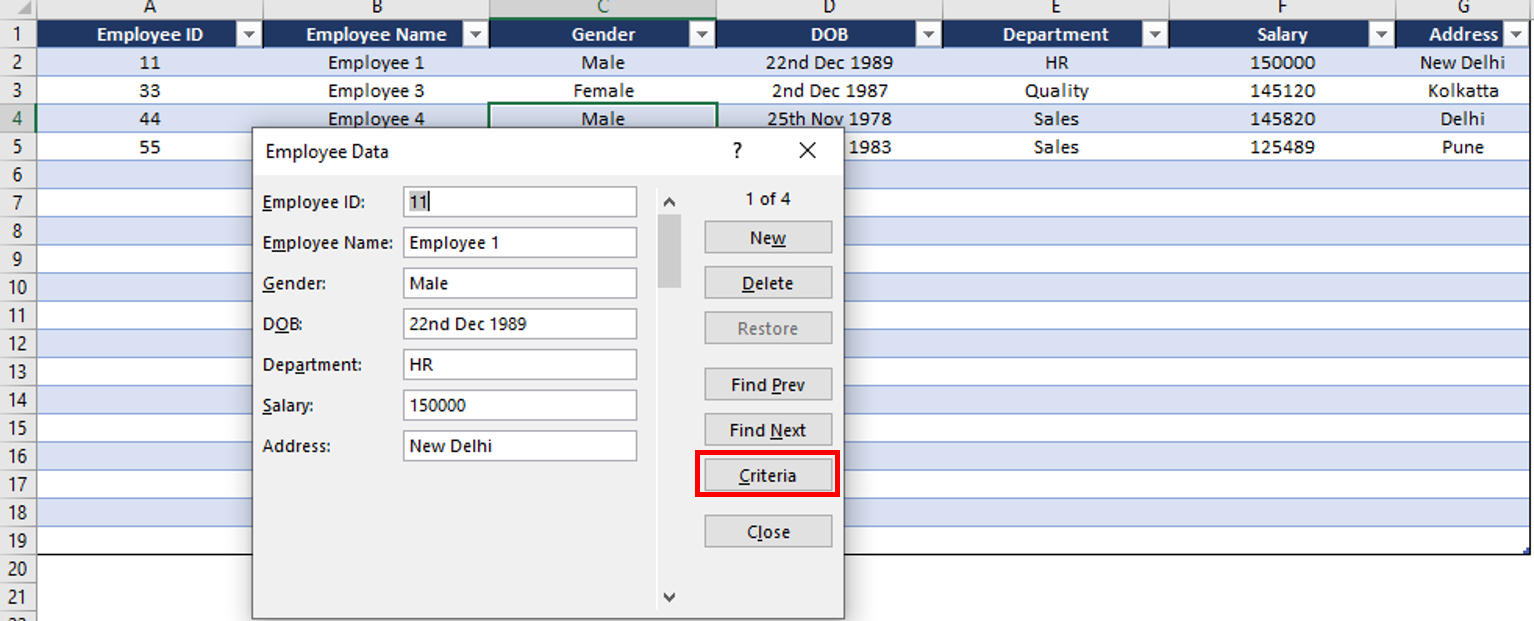
Find a Specific Entry
If you table has several records and you are facing difficulties in finding the record then you can utilize the “Criteria” button in the form to find a specific entry.
For example, if you want to find entries from below table where ‘Gender’ is ‘Male’, just click on criteria button, enter the criteria in the input box and press Enter.

You will get the data entries matching your criteria. You can also use your criteria in more than one input box. If output will be more than one record then you can utilize ‘Scrollbar’ or ‘Find Prev’/’Find Next’ button to navigate from one record to other.
Important points
Conclusion
This hidden data entry form is very useful to create form quickly with several features and you can utilize it in your day to day activities. There is no doubt that it has some limitation and you will not be able to create form in the same way we design and develop in VBA.
If your requirement is more than the features and options available in this Data Entry Form then you can explore our tutorial on creating Excel Form, User Form in VBA. Please refer the below link.
Data Entry Form in Excel Sheet
Advanced Data Entry form in Excel Sheet with Add, Search, Modify, Delete and Reset
Click Here to download the practice file.
Please watch our YouTube tutorials.


