Table of Contents
In this post, we are going to learn VBA automation through a live project. We will develop a fully automated Complaint Management System.
We will cover UserForm, Text Box, Label, Combo Box, List Box, Multipage, Command Buttons and other ActiveX controls and respective events in this automated tool. Once you learn all these controls and coding, you will be able to build any data entry application in Excel and VBA.
Let’s start developing the automated complaint management application from scratch.
Creating Excel File for Complaint Management System
Let’s head to start menu and open the Excel application.
Now, create a blank workbook and save the file with “Complaint Management System”. Make sure to select the macro enabled extension i.e. XLSM.

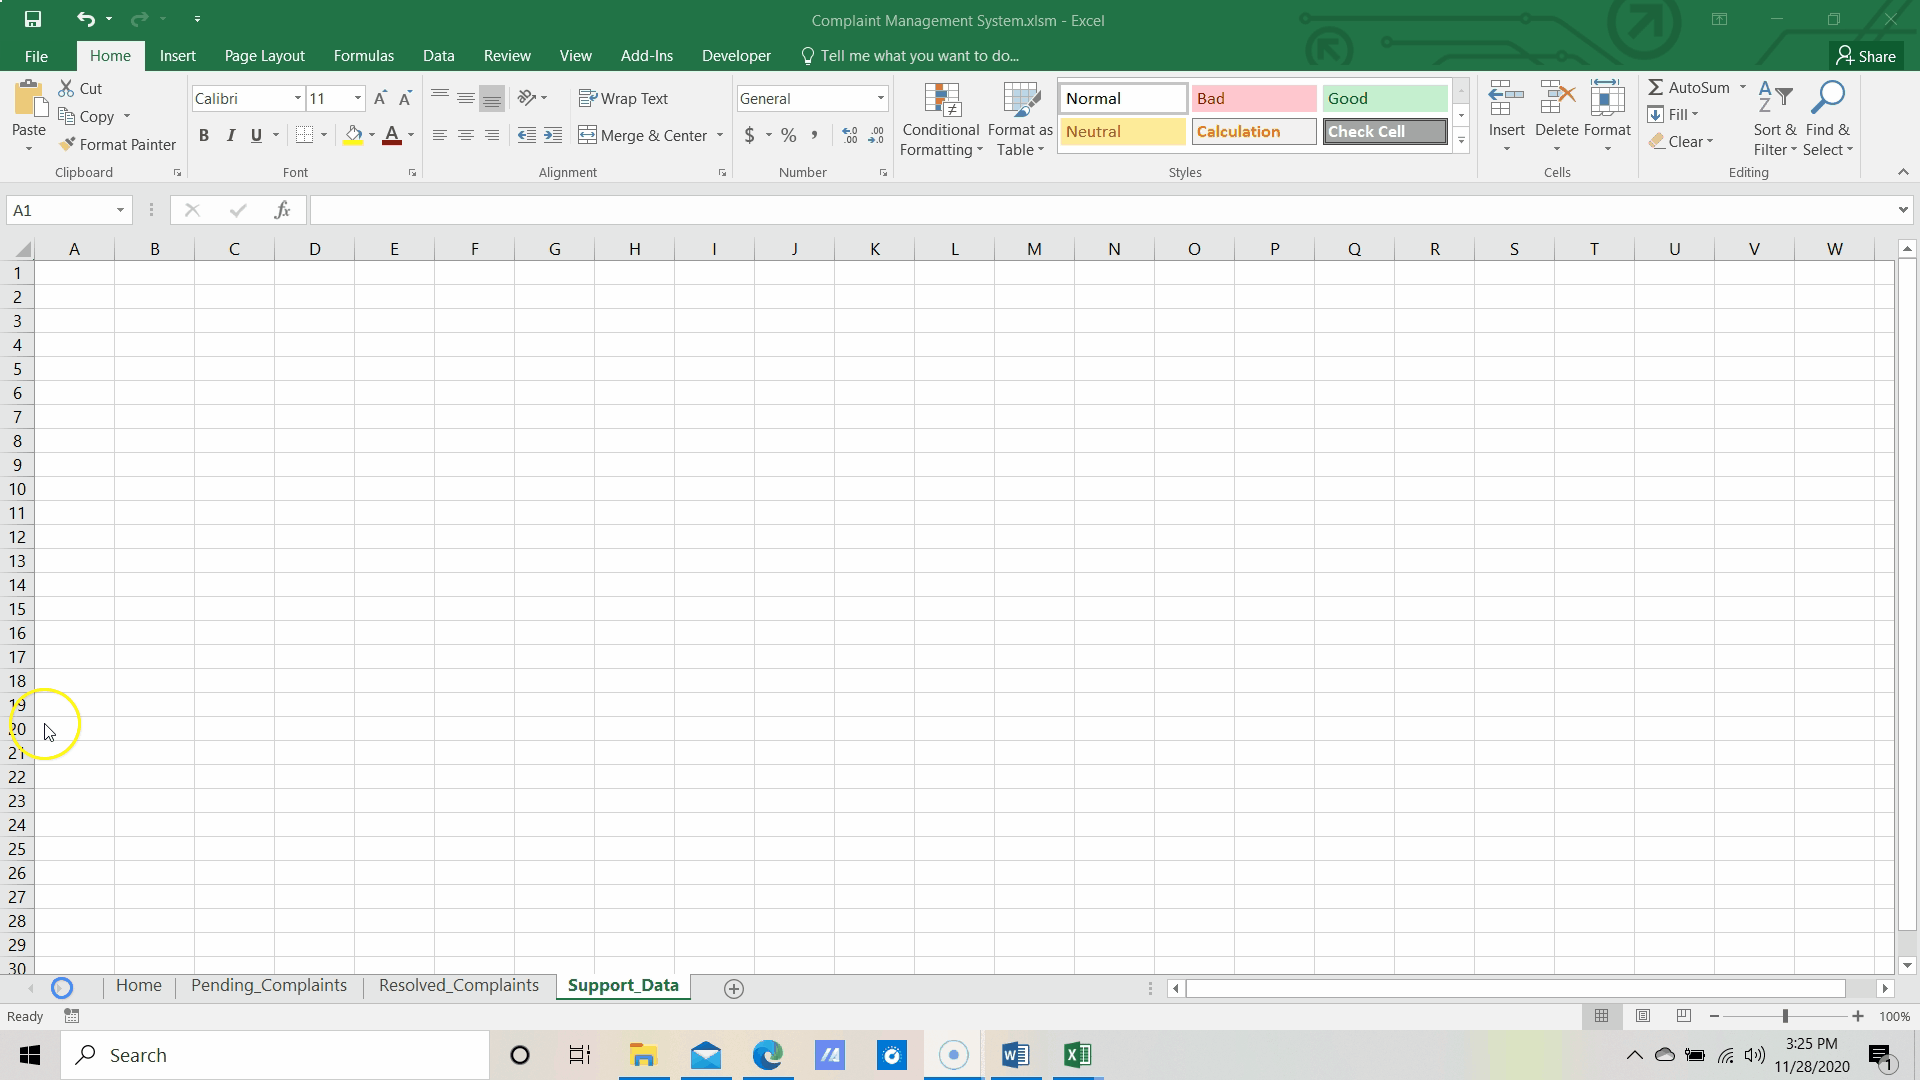
We have saved our file. In this project, we need 4 different worksheets. As one worksheet is already in this workbook, let’s quickly add other three.
To add worksheet, just click on + icon available beside the sheet1.
Now, we have added 4 different sheets required for our project.
Let’s change the name to “Home”, “Pending_Complaints”, “Resolved_Complaints” and “Support_Data”.

Now, time to design the Home sheet and then we will move to other worksheets.
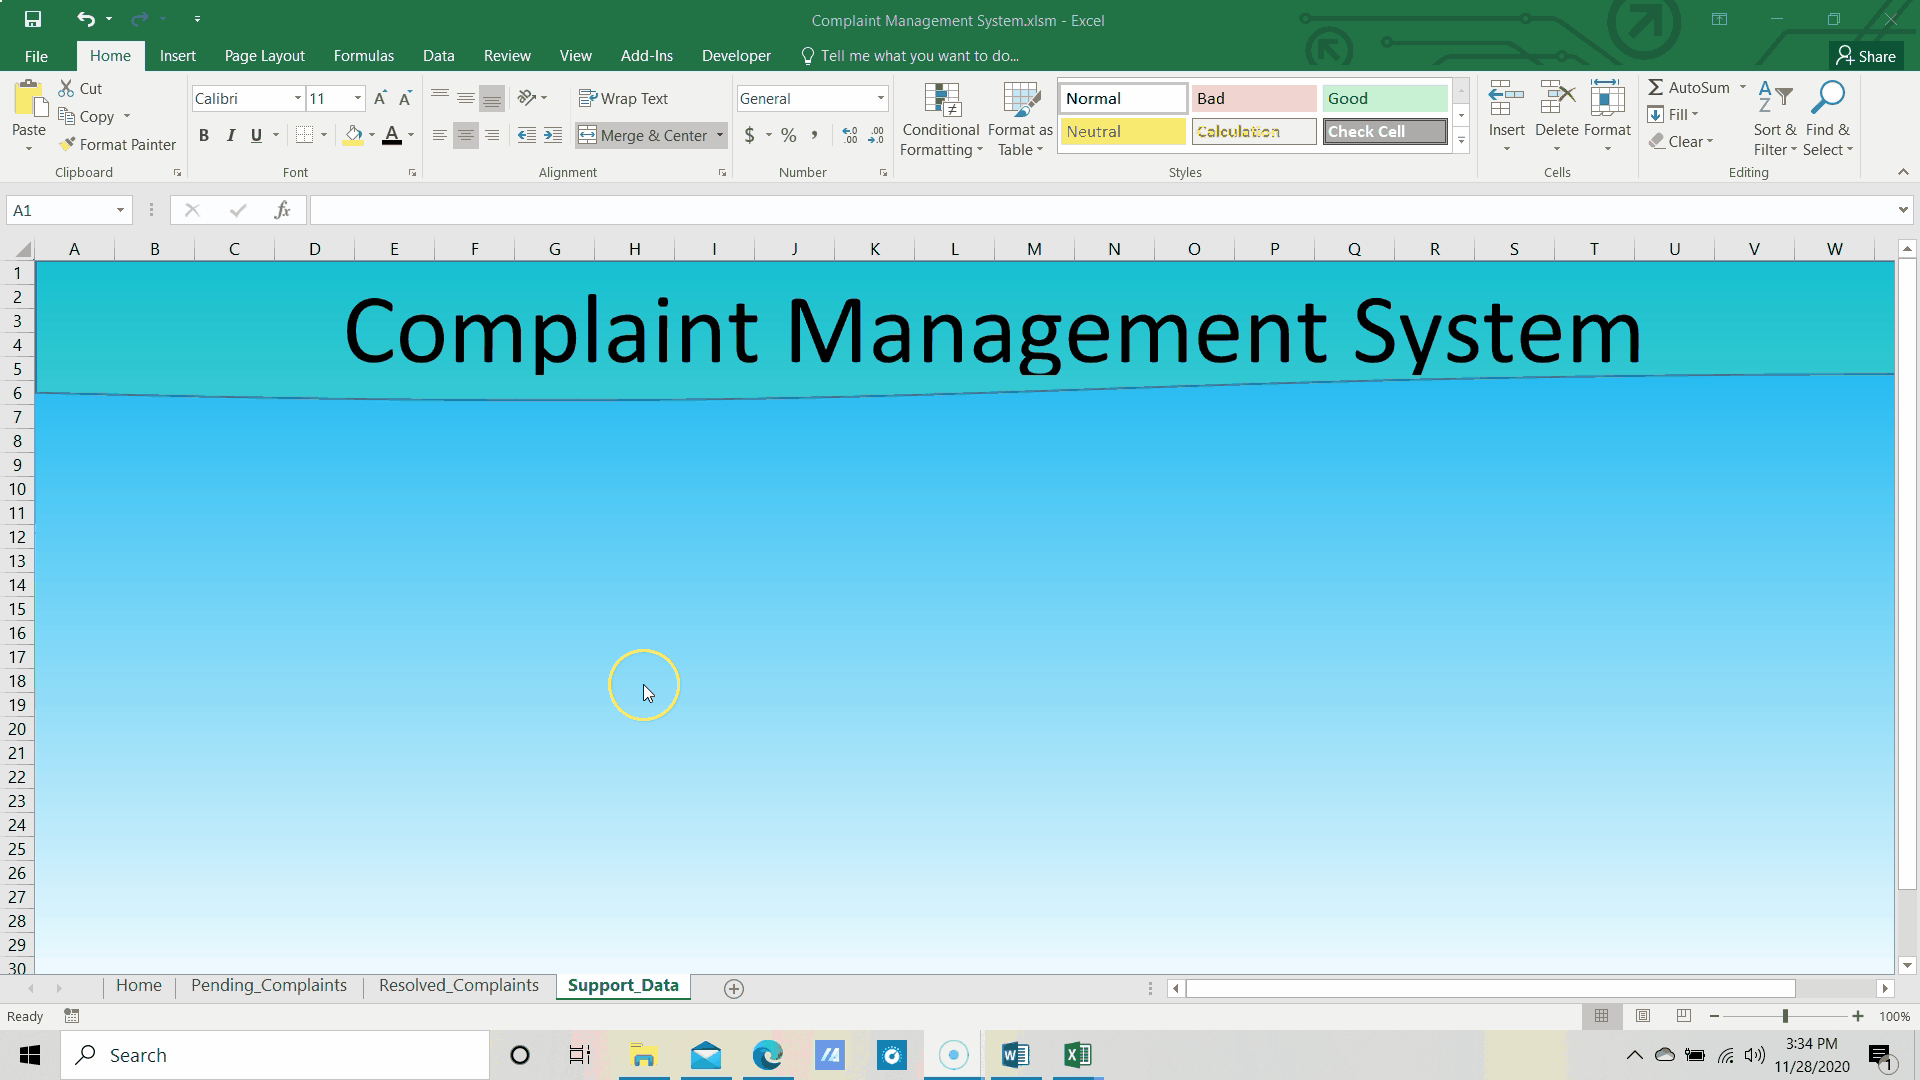
Just select range starting from A1 to X34 and then move to Home Tab and then click on “Merge & Center” under alignment group. To fill the merged range with Gradient fill color, just press the shortcut key CTRL + 1 to open the Format Cells window.
In Format Cells window, Fill tab and then click on Fill Effect. In Fill effects window, just select ‘Two Colors’ in Gradient group and change the Color 1 to ‘Light Blue’ available in ‘Standard color group’ and Color 2 as ‘White”.
In Shading styles, select the Horizontal option and then select the first variants. Now click on Okay to come out from ‘Fill Effect’ window and again click on Okay button in ‘Format Cells’ window to apply the Gradient colors.
Now you can see that merged ranges are filled with beautiful gradient color.
Let’s create header in this sheet. To do that, let’s head to Inset tab and then under illustration group, click on Shapes and then select the ‘Document’ shape in ‘Flowchart’ section.
Draw this shape for header. Now, fill this shape with Light green color with 70% Transparency.
Now, Right Click on the shape and edit the text to give the Caption as “Complaint Management System”. Change the font size to 60, Font name to ‘Calibri’ and Font color as Black and alignment is ‘Center’.
Now, we have done with header. Let’s insert a shape to create a button with name “Raise Complaint”.
Apply the required formatting and shadow.
We have done with Home sheet. Let’s create required Headers in “Pending_Complaints” sheet.
Columns are : Date, Employee Name, Customer Name, Customer Email, Customer Country, Reason for Complaint, Case Priority, VIP Customer? Complaint Description

Now, we have done with ‘Pending_Complaint’ sheet. Let us create the headers in ‘Resolved_Complaints’.
Columns are : Date, Employee Name, Customer Name, Customer Email, Customer Country, Reason for Complaint, Case Priority, VIP Customer? Complaint Description, Resolution Summary, Case Handled By, Case Handled On

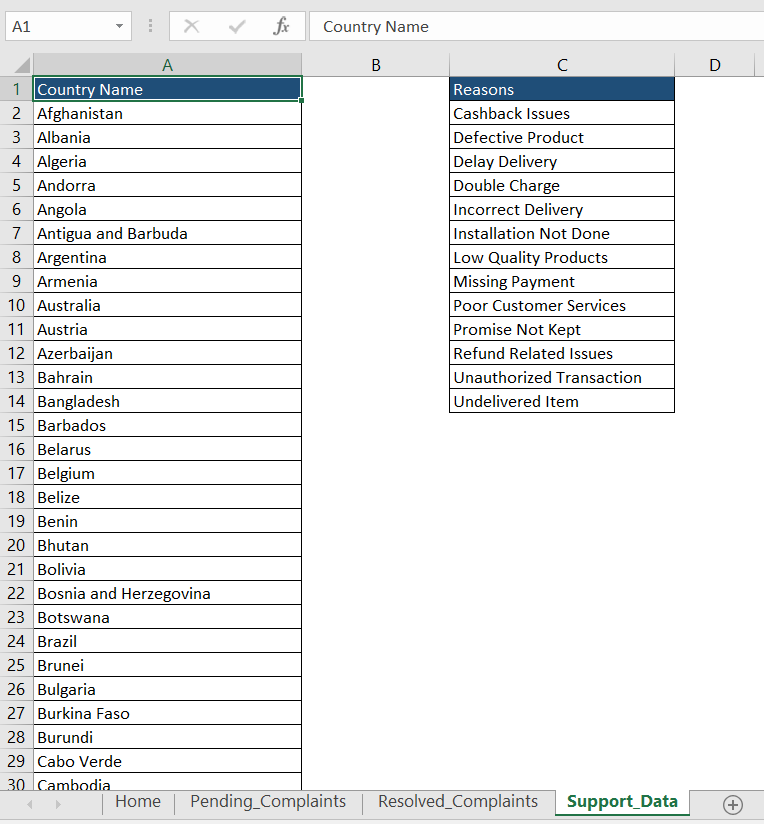
Let’s move to ‘Support_Data’ sheet and create two different list for Country and Reasons. We will be utilizing three combo box in our project so that user can select Country Name, Reason and Priority for complaints. To make first two combo box dynamic, we have to create Country and Reasons list in Support_Data sheet.
Mention all the countries in country name and reason in reason name list. Please refer the below image.
So, we have done with all the required worksheets and data to develop this automated tracker. Let’s move to ‘Visual Basic for Application’ window and develop the tracker.
Designing UserForms and Inserting Module
To jump to VBA window, click on ‘Developer Tab and then under ‘Code’ Group, click on VBA button. Alternatively, you can also press shortcut key as ALT + F11 to open VBA window.

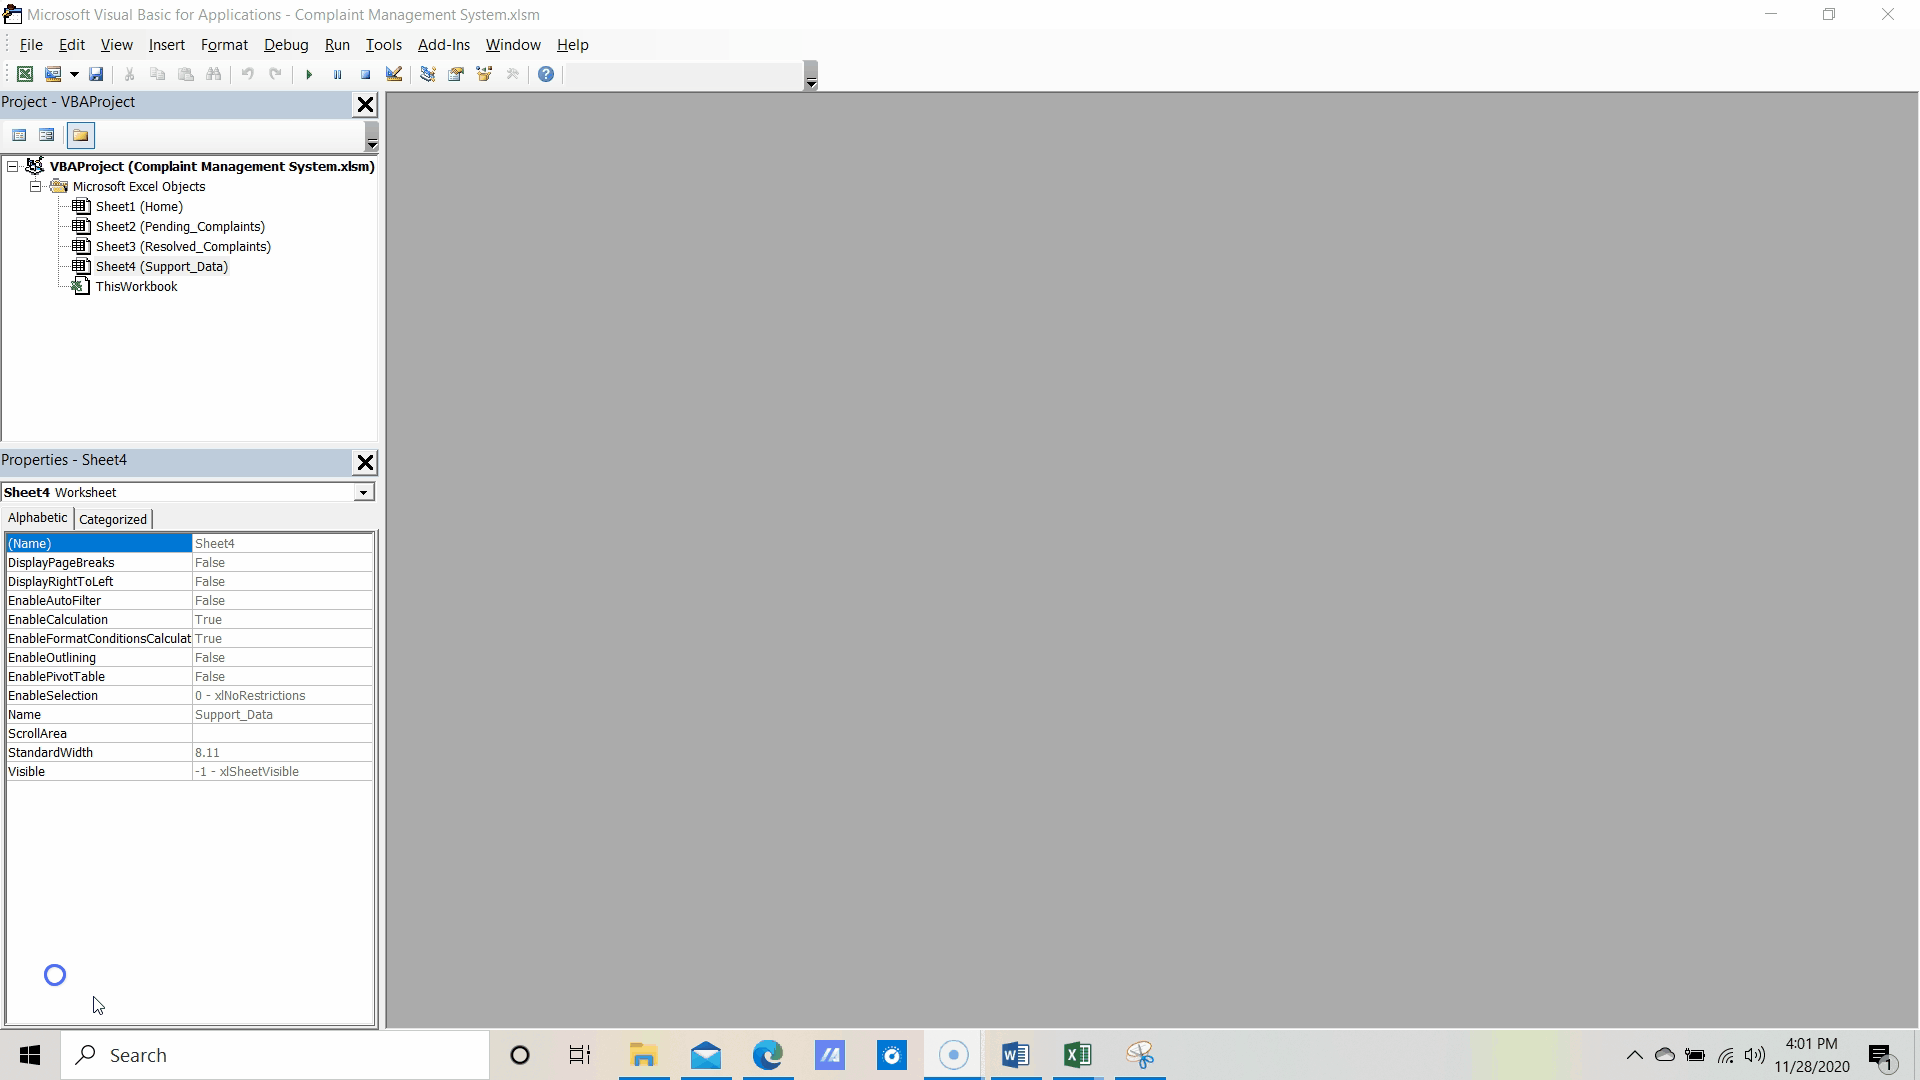
Now, we are in Visual Basic for Application window. Here, we need to insert two different User Forms (one is to raise the complaint and second one is to resolve the complaint) and one module to contain most of the Sub procedures and function.
To insert a form, head to Insert menu and then click on ‘User Form’. Repeat the same process to insert one more form.
Let’s add a blank module. To do that, just click on ‘Insert’ menu and then select ‘Module’.
Now, you can see that we have two different forms and one module in our project.
Let’s design the User Interface in both the forms and then we will start writing the code.
Designing ‘Complaint Management System’ main form
Let us set the properties of Complaint Management System form and add required controls.
As form will have three different parts (First is to raise the compliant, second is to show the summary and third is to show the list of Pending and Resolved complaints), let us design the form.
Please see the below image and insert the controls and set the properties accordingly (You can watch the YouTube tutorial for all the required steps)
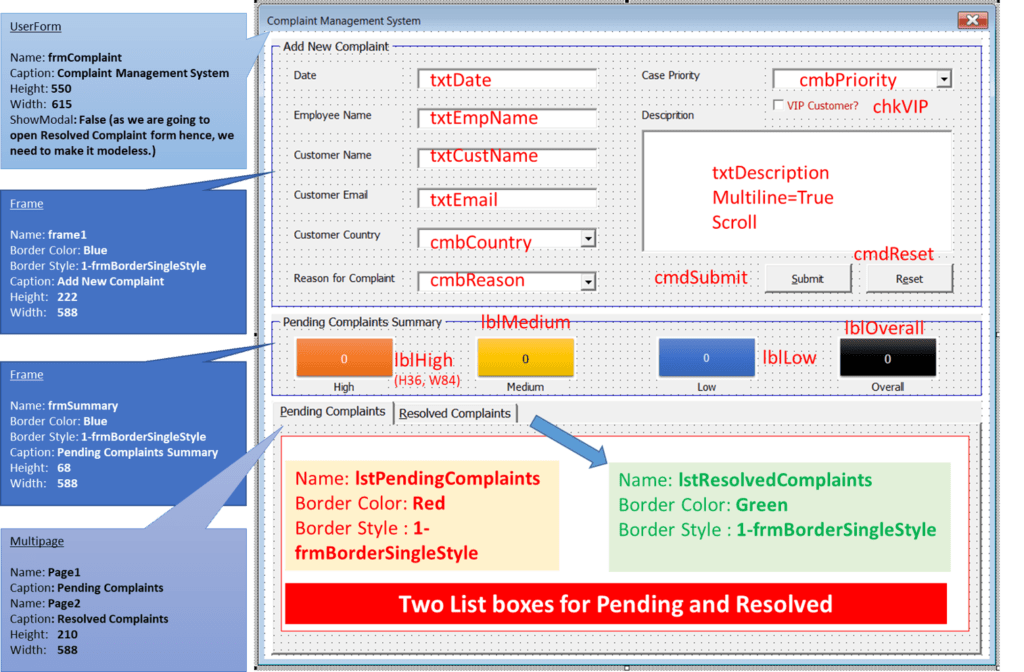
Now, we have done with designing the Complaint Management main form. Let’s set the tab order.
Designing Resolve Complaint Form
Let’s design the next form which is for resolving the pending complaints. See the below image and replicate the design and properties.
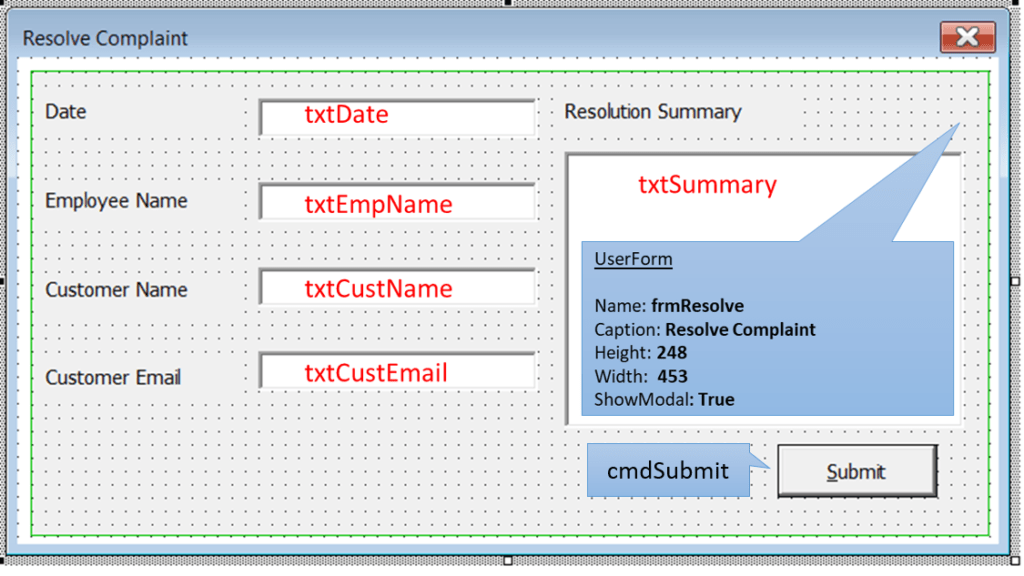
Now set the tab order for all the input controls.
Here, we have done with designing both the forms. Let us start writing the code.
Writing VBA Code to Raise and Resolve a Complaint
Now, let us start writing the functions and sub procedures required for our project in module.
So, first of all we will write a Sub Procedure to apply default color white as a background color to Textbox and Combo box input controls. With the help of this module, we will be able to remove the red background color after passing the input validation.
Sub DefaultColor_Pending()

    With frmComplaint

        'Set the Default White color

        .txtDate.BackColor = vbWhite
        .txtEmpName.BackColor = vbWhite
        .txtCustName.BackColor = vbWhite
        .txtEmail.BackColor = vbWhite
        .cmbCountry.BackColor = vbWhite
        .cmbReason.BackColor = vbWhite
        .cmbPriority.BackColor = vbWhite
        .txtDescription.BackColor = vbWhite

    End With

End Sub
Now, let us create a new sub procedure to assign the row source reference to the Pending and Resolved Listbox controls. RowSource will be fully dynamic hence, code will auto adjust the ranges of listbox basis the data availability in the respective worksheets.
Sub ListBoxReference()

        'Assign the reference to listbox - Pending and Resolved

        Dim iRow_Pending As Long 'Last Blank row in Pending Complaints
        Dim iRow_Resolved  As Long 'Last blank row in resolved complaints

        iRow_Pending = ThisWorkbook.Sheets("Pending_Complaints").Range("A" & Application.Rows.Count).End(xlUp).Row
        iRow_Resolved = ThisWorkbook.Sheets("Resolved_Complaints").Range("A" & Application.Rows.Count).End(xlUp).Row

        'Setting the Reference to ListBox - Pending Complaints

        frmComplaint.lstPendingComplaints.ColumnCount = 9
        frmComplaint.lstPendingComplaints.ColumnHeads = True

        If iRow_Pending = 1 Then

           frmComplaint.lstPendingComplaints.RowSource = "Pending_Complaints!A2:I2"

        Else

            frmComplaint.lstPendingComplaints.RowSource = "Pending_Complaints!A2:I" & iRow_Pending

        End If


         'Setting the Reference to ListBox - Resolved Complaints
        frmComplaint.lstResolvedComplaints.ColumnCount = 12
        frmComplaint.lstResolvedComplaints.ColumnHeads = True

        If iRow_Resolved = 1 Then

           frmComplaint.lstResolvedComplaints.RowSource = "'Resolved_Complaints'!A2:L2"

        Else

            frmComplaint.lstResolvedComplaints.RowSource = "'Resolved_Complaints'!A2:L" & iRow_Resolved

        End If


End Sub
Now, we have done with dynamic list range to country and reason combo box.
Let us write a new sub procedure to initialize all the controls available in Complaint Management System form. With the help of this procedure, we will reset the form, refresh the source data of listbox and combo box.
Sub Initialize_PendingComplaint()

    With frmComplaint

        'Set the default Value

        .txtDate.Value = [Text(Today(), "DD-MMM-YYYY")]
        .txtDate.Enabled = False

        .txtEmpName.Value = Environ("username")
        .txtEmpName.Enabled = False

        .txtCustName.Value = ""
        .txtEmail.Value = ""


        'Creating a dynamic name for Country and assigning it to Country combo-box

        Sheets("Support_Data").Range("A2", Sheets("Support_Data").Range("A" & Application.Rows.Count).End(xlUp)).Name = "Country"

        .cmbCountry.RowSource = "Country"

        .cmbCountry.Value = ""


        'Creating a dynamic name for Reason and assigning it to Reason combo-box

        Sheets("Support_Data").Range("C2", Sheets("Support_Data").Range("C" & Application.Rows.Count).End(xlUp)).Name = "Reason"

        .cmbReason.RowSource = "Reason"

        .cmbReason.Value = ""

        'Priority Combo-box

        .cmbPriority.Clear
        .cmbPriority.AddItem "High"
        .cmbPriority.AddItem "Medium"
        .cmbPriority.AddItem "Low"

        .cmbPriority.Value = ""

        'VIP customer
        .chkVIP.Value = False

        'Complaint Description
        .txtDescription.Value = ""

         'Activate the Pending Page in MultiPage control

         'Selecting 1 then 2 page in multipage so that event on page selection will get fired and calculate the numbers
         .MultiPage.Value = 1 ' one for 1st page i.e. Resolved
         .MultiPage.Value = 0 ' zero for 1st page i.e. pending

    End With

    'Setting the reference of Listbox

    Call ListBoxReference

    'Assigning the default colors to input controls

    Call DefaultColor_Pending

End Sub
Let’s write a Function to validate the entries made by user. Function type would be Boolean; it means if any of the input will be invalid as per validation then it will return FALSE otherwise it will be TRUE.
'Function To Validate the Entries

Function ValidatePending() As Boolean

    ValidatePending = True

    Call DefaultColor_Pending   ' Call Default Color procedure to apply white color as a back color to inputs

    With frmComplaint

        If .txtCustName.Value = "" Then

            MsgBox "Please enter the customer name.", vbOKOnly + vbInformation, "Customer Name"
            .txtCustName.SetFocus
            .txtCustName.BackColor = vbRed
            ValidatePending = False
            Exit Function

        ElseIf .txtEmail.Value = "" Then

             MsgBox "Please enter the email id.", vbOKOnly + vbInformation, "Email ID"
            .txtEmail.SetFocus
            .txtEmail.BackColor = vbRed
            ValidatePending = False
            Exit Function

        ElseIf .cmbCountry.Value = "" Then

             MsgBox "Please select the Country name from the drop-down.", vbOKOnly + vbInformation, "Country Name"
            .cmbCountry.SetFocus
            .cmbCountry.BackColor = vbRed
            ValidatePending = False
            Exit Function

        ElseIf .cmbReason.Value = "" Then

             MsgBox "Please select the Complaint reason from the drop-down.", vbOKOnly + vbInformation, "Complaint Reason"
            .cmbReason.SetFocus
            .cmbReason.BackColor = vbRed
            ValidatePending = False
            Exit Function

        ElseIf .cmbPriority.Value = "" Then

             MsgBox "Please select the priority from the drop-down.", vbOKOnly + vbInformation, "Priority"
            .cmbPriority.SetFocus
            .cmbPriority.BackColor = vbRed
            ValidatePending = False
            Exit Function

        ElseIf .txtDescription.Value = "" Then

            MsgBox "Please enter the description.", vbOKOnly + vbInformation, "Description"
            .txtDescription.SetFocus
            .txtDescription.BackColor = vbRed
            ValidatePending = False
            Exit Function

        End If

    End With

End Function
Let’s create a new sub procedure to show the form. We will utilize this procedure while assigning the macro on ‘Raise Complaint’ button available in Excel sheet.
Sub Show_Form()

    frmComplaint.Show

End Sub
So, we have done with the required code for Module 1.
Let’s move to Complaint Management System form and start writing the code and calling the procedures & functions while handling the events.
So, first of all we will write the code on Form Initialization event. Let us select the Initialize the event from the dropdown.
As we have already written a sub procedure to handle initialize or reset process. Let’s call that procedure here.
Private Sub UserForm_Initialize()

    Call Initialize_PendingComplaint

End Sub
Let us write the code to update the numbers in summary section of this form. Here, we will update the numbers on page change event of MultiPage control.
Let us select MultiPage from the object drop-down and change event from the events drop-down.
Write the below code to update the summary basis data availability in Pending and Resolve sheets.
Private Sub MultiPage_Change()

    Dim i As Integer, j As Integer, k As Integer  'To store the count High, Medium and Low priority cases

    If MultiPage.Value = 0 Then ' zero for Pending Tab

        i = [COUNTIF(Pending_Complaints!G:G, "High")]

        j = [COUNTIF(Pending_Complaints!G:G, "Medium")]

        k = [COUNTIF(Pending_Complaints!G:G, "Low")]

        With frmComplaint

            .frmSummary.Caption = "Pending Complaints Summary"

            .lblHigh.Caption = i
            .lblMedium.Caption = j
            .lblLow.Caption = k
            .lblOverall.Caption = i + j + k

        End With
    Else

        i = [COUNTIF(Resolved_Complaints!G:G, "High")]

        j = [COUNTIF(Resolved_Complaints!G:G, "Medium")]

        k = [COUNTIF(Resolved_Complaints!G:G, "Low")]

        With frmComplaint

            .frmSummary.Caption = "Resolved Complaints Summary"

            .lblHigh.Caption = i
            .lblMedium.Caption = j
            .lblLow.Caption = k
            .lblOverall.Caption = i + j + k

        End With
    End If
 End Sub
Let us write the code on click event of Reset Button.
Private Sub cmdReset_Click()

    Dim i As VbMsgBoxResult

    i = MsgBox("Do you want to reset the form?", vbYesNo + vbQuestion, "Reset")

    If i = vbNo Then Exit Sub

    Call Initialize_PendingComplaint

End Sub
Now, we need to write the code to transfer the inputs to Pending_Complaints sheet and show the data to Pending Complaints listbox.
Let us write the code on Click event of Submit button.
Private Sub cmdSubmit_Click()


    Dim msgResult As VbMsgBoxResult

    msgResult = MsgBox("Do you want to tranfer the data?", vbYesNo + vbQuestion, "Transfer")

    If msgResult = vbNo Then Exit Sub

    'Validation entries
    If ValidatePending = False Then Exit Sub

    Dim sh As Worksheet
    Dim iRow As Long ' Variable to store the last blank row

    Set sh = ThisWorkbook.Sheets("Pending_Complaints")


    iRow = sh.Range("A" & Rows.Count).End(xlUp).Row + 1 ' Last blank row

    With frmComplaint

        sh.Range("A" & iRow).Value = .txtDate.Value                 'Date
        sh.Range("B" & iRow).Value = .txtEmpName.Value              'Employee Name
        sh.Range("C" & iRow).Value = .txtCustName.Value             'Customer Name
        sh.Range("D" & iRow).Value = .txtEmail.Value                'Email ID
        sh.Range("E" & iRow).Value = .cmbCountry.Value              'Country
        sh.Range("F" & iRow).Value = .cmbReason.Value               'Reason
        sh.Range("G" & iRow).Value = .cmbPriority.Value             'Priority
        sh.Range("H" & iRow).Value = IIf(.chkVIP.Value, "Yes", "No") 'VIP Customer
        sh.Range("I" & iRow).Value = .txtDescription.Value          'Description

    End With

    'Reset the form after transferring the data

    Call Initialize_PendingComplaint

End Sub
Now, we need to write the code to open the frmResolve form with selected data. So, here whenever user will double click on any of the available records in Pending Complaints listbox then it will open the Resolve complaint form with selected data.
Let us double click on lstPendingComplaints listbox and write the code on double click event.
Private Sub lstPendingComplaints_DblClick(ByVal Cancel As MSForms.ReturnBoolean)

    'If no data available in lstPendingComplaints
    If Me.lstPendingComplaints.List(Me.lstPendingComplaints.ListIndex, 0) = "" Then Exit Sub


    'Code to update the value to respective controls

    Load frmResolve ' Load the form in memory

    'Code to load the default values to frmResolve

    With frmResolve

        .txtDate.Value = [Text(Today(), "DD-MMM-YYYY")]
        .txtDate.Enabled = False

        .txtEmpName.Value = Environ("username")
        .txtEmpName.Enabled = False

        .txtCustName.Value = Me.lstPendingComplaints.List(Me.lstPendingComplaints.ListIndex, 2) ' Customer Name - 3rd Column
        .txtCustName.Enabled = False

        .txtCustEmail.Value = Me.lstPendingComplaints.List(Me.lstPendingComplaints.ListIndex, 3) ' Customer Email ID - 4th Column
        .txtCustEmail.Enabled = False

        .txtSummary.Value = ""

        .Show 'Show the form

    End With

End Sub
Here, we have done with all the codes required on first form i.e. Complaint Management system.
Let us move to the next form i.e. Resolve Complaint and write the code to submit the data to Resolve Complaint worksheet and delete the respective record from Pending Complaints data.
Let’s double click on Submit button on Resolve Complaint form and write the below code.
Private Sub cmdSubmit_Click()


    'Code to take the confirmation from user

    Dim msgResult As VbMsgBoxResult

    msgResult = MsgBox("Do you want to submit this data?", vbYesNo + vbQuestion, "Submit Resolution")

    If msgResult = vbNo Then Exit Sub

    'Validating the Resolution summary

    If Me.txtSummary.Value = "" Then

        Me.txtSummary.BackColor = vbRed
        Me.txtSummary.SetFocus

        MsgBox "Resolution summary is blank.", vbOKOnly + vbInformation, "Summary"
        Exit Sub

    End If

    Dim iRow As Long 'Variable to identify the next blank row in Resolved Complaints sheet
    Dim sh As Worksheet ' variable to refer the resolved complaint sheet
    Dim lstRow As Long 'Variable to store the selected row in list box


    Me.txtSummary.BackColor = vbWhite 'Default color

    Set sh = ThisWorkbook.Sheets("Resolved_Complaints") 'Setting the reference of Resolved Complaints sheet

    iRow = sh.Range("A" & Application.Rows.Count).End(xlUp).Row + 1 'Identifying the last blank row


    'Transferring data to Resolved_Complaints sheet

    With frmComplaint.lstPendingComplaints

        lstRow = .ListIndex 'store the selected row number in pending complaint list

        sh.Range("A" & iRow).Value = Format(.List(lstRow, 0), "dd-mmm-yyyy") 'Date

        sh.Range("B" & iRow).Value = .List(lstRow, 1) 'Complaint Raised by - Emp Name
        sh.Range("C" & iRow).Value = .List(lstRow, 2) ' Customer Name
        sh.Range("D" & iRow).Value = .List(lstRow, 3) 'Customer email
        sh.Range("E" & iRow).Value = .List(lstRow, 4) 'Country
        sh.Range("F" & iRow).Value = .List(lstRow, 5) 'Reason
        sh.Range("G" & iRow).Value = .List(lstRow, 6) 'Priority
        sh.Range("H" & iRow).Value = .List(lstRow, 7) 'VIP Customer
        sh.Range("I" & iRow).Value = .List(lstRow, 8) 'Complaint Description

        sh.Range("J" & iRow).Value = frmResolve.txtSummary.Value 'Resolution Description
        sh.Range("K" & iRow).Value = frmResolve.txtEmpName.Value 'Commplaint Handled by
        sh.Range("L" & iRow).Value = frmResolve.txtDate.Value 'Case Handled Date

    End With


    Sheets("Pending_Complaints").Rows(lstRow + 2).EntireRow.Delete 'for row 1, lstRow will show 0 hence we need to add 2 as 1st row in sheet is for header

    Call ListBoxReference   'Refreshing the listbox range to show the udpated data

    Unload Me 'Closing the resolution form

End Sub
So we have done with all the codes. Let us head to Debug menu and compile our VBA project to find any syntax error. If there would be no error then you can move to Excel window and assign the macro on button available in Home sheet.
So this is all about the Complaint management system in Excel.
I hope you have enjoyed this lesson and if you have any question you can always ask me in comment section.
Please watch the YouTube Tutorial.
CMS Part 1 (Demo)
CMS Part 2 (Creating Excel file and Support Data)
CMS Part 3 (Creating UserForm and Input Controls)
CMS Part 4 (Creating Resolve Complaints UserForm)
CMS Part 5 (Writing Sub Procedures and Functions)
CMS Part 6 (VBA Code to resolve the pending complaints)
Download this File
Please download the Complaint Management System Excel File with 100% & well formatted VBA codes.


")
