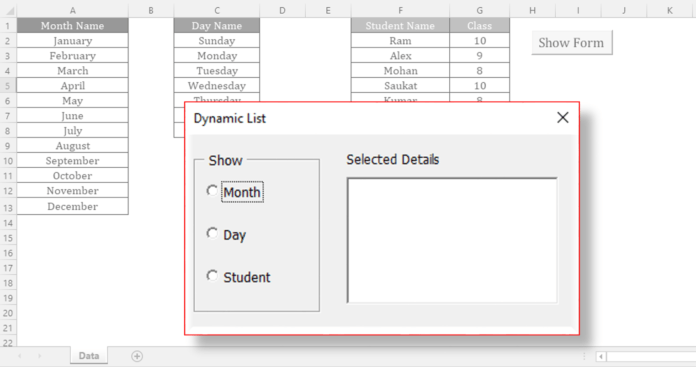
In this tutorial, we will learn how to make a listbox dynamic and switch to different data range on selection. We will also learn how to create a Dynamic Name with VBA code and assign it to ListBox RowSource.
You can use the logic and coding in your automation project. So, let’s start creating this from scratch.
Let us switch to Excel application. Create a new workbook and save with the name “Multiple List in a Single ListBox.XLSM”. Make sure to select .XLSM as extension.
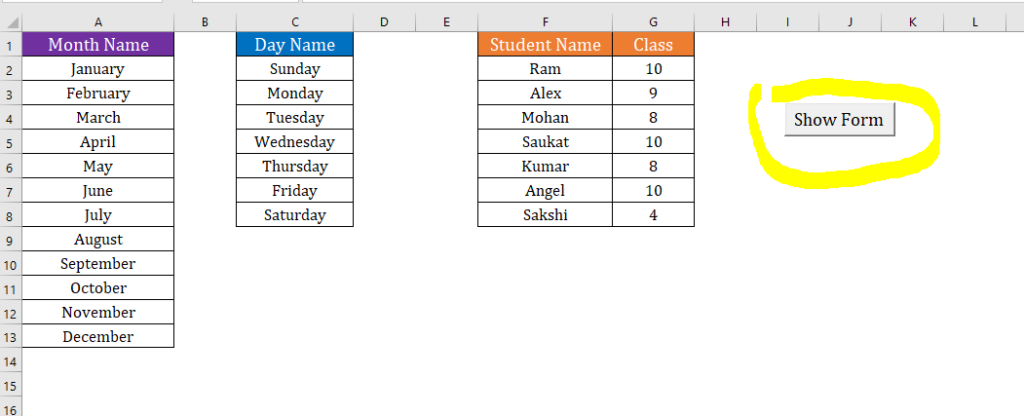
Change the name of Sheet1 to Data. Create sample data and table for rowsource of Listbox. Follow the below image to create tables.

So, here we have created three different tables. We will show all these Tables in ListBox on selection. It means when the user will select Month then ListBox will show the Month as list items and if the user will select Day then ListBox will show Day otherwise Listbox will show Student Table.
Let us insert a command button to load and show the UserForm. To insert a command button, just click on Developer Tab, click on Insert then select Command Button under ActiveX Controls. Change the properties of command button as mentioned below.
Name: cmdShowForm Accelerator Key: S Caption: Show Form

Let us move to Visual Basic of Application Window. To switch to the VBA window, just click on Developer Tab then click on Visual Basic button available under code group.
Now, we are in the VBA window. Let us insert a UserForm.
To insert a UserForm, just click on Insert Menu then Click on UserForm. Change the properties on UserForm as given below.
Form Name: frmForm; Form Caption: Dynamic List; Height:170; Width: 290
Insert a Frame and change the caption to “Show”
Insert three Option buttons in frame
Name: optMonth, Caption: Month
Name: optDay, Caption: Day
Name: optStudent, Caption: Student
Insert a Label and keep the name same as Label1 with caption “Selected Details”
Insert a ListBox and give the name as lstDetails

Now, we have done with Form creation. Let’s start writing code.
Let us move to Form Code and write the code on form initialization to create dynamic names. We will use the names as a RowSource of Listbox.
Code for form initialization to create dynamic names
Private Sub UserForm_Initialize()

    Dim iMonthRow As Long 'to identify and store the last row in month column

    Dim iDayRow As Long 'to identify and store the last row in day column

    Dim iStudentRow As Long 'to identify and store the last row in student table

    iMonthRow = Sheets("Data").Range("A" & Rows.Count).End(xlUp).Row

    iDayRow = Sheets("Data").Range("C" & Rows.Count).End(xlUp).Row

    iStudentRow = Sheets("Data").Range("F" & Rows.Count).End(xlUp).Row

   'Creating Month Name
    ThisWorkbook.Names.Add Name:="Month_Name", RefersToLocal:=Sheets("Data").Range("A2:A" & iMonthRow)

   'Creating Day Name
    ThisWorkbook.Names.Add Name:="Day_Name", RefersToLocal:=Sheets("Data").Range("C2:C" & iDayRow)

   'Creating Student Name
    ThisWorkbook.Names.Add Name:="Student_Name", RefersToLocal:=Sheets("Data").Range("F2:G" & iStudentRow)

End Sub
Write the code on the click event of Month option button.
Write the code on the click event of Day option button
Private Sub optDay_Click()

    Me.Label1.Caption = "Day Name" ‘Change the caption of label

    Me.lstDetails.ColumnCount = 1  ‘as only one column for Month

    Me.lstDetails.ColumnHeads = False ‘don’t need column heads for day

    Me.lstDetails.RowSource = "Day_Name"

End Sub
Write the code on the click event of Day option button
Private Sub optStudent_Click()

    Me.Label1.Caption = "Student's Details" ‘Change the caption of label

    Me.lstDetails.ColumnCount = 2 ‘we need two columns for Student Name and Class

    Me.lstDetails.ColumnHeads = True ‘need to show column heads for student table

    Me.lstDetails.RowSource = "Student_Name"

End Sub
Let’s write the code on click event of command button cmdShow
Code to show the UserForm
Private Sub cmdShowForm_Click()
    frmForm.Show
End Sub
Now, we have completed all the coding and designing the form.
So, this is all about how to create a dynamic listbox and change the RowSource of ListBox on selection.
Watch our YouTube tutorial.
Please click on below button to download the Excel file along with codes.


